1.Debian packages
...
1.0.0 release
...
| Code Block |
|---|
| language | bash |
|---|
| theme | Emacs |
|---|
| title | Update Source List |
|---|
|
# 1. Remove the original nightly build debian source(main) in /etc/apt/sources.list if any (using ```sed``` to replace that line with blank line)
sudo sed -i  's#deb https://dl.bintray.com/rackhd/debian trusty main##' /etc/apt/sources.list
# 2. add release debian source(release) in /etc/apt/sources.list
echo deb https://dl.bintray.com/rackhd/debian trusty release | sudo tee -a /etc/apt/sources.list

sudo apt-key adv --keyserver hkp://keyserver.ubuntu.com:80 --recv-keys 379CE192D401AB61
sudo apt-get update |
| Code Block |
|---|
| language | bash |
|---|
| theme | Emacs |
|---|
| title | Install RackHD release version |
|---|
|
sudo apt-get install rackhd |
| Info |
|---|
|
If the nightly build debian source exists in /etc/apt/sources.list (```deb https://dl.bintray.com/rackhd/debian trusty main```) the RC(release candidate) build will be treated newer than offical released version, say, "apt-get" will think of 1.0.0-20170116UTC is newer than 1.0.0. and you will never install release version using ```apt-get install rackhd```. |
| Code Block |
|---|
| language | bash |
|---|
| theme | Emacs |
|---|
| title | Update Source List |
|---|
|
 echo deb https://dl.bintray.com/rackhd/debian trusty main | sudo tee -a /etc/apt/sources.list
 sudo apt-key adv --keyserver hkp://keyserver.ubuntu.com:80 --recv-keys 379CE192D401AB61
sudo apt-get update |
- Get available version list
| Code Block |
|---|
| language | bash |
|---|
| theme | Emacs |
|---|
| title | Get available version list |
|---|
|
sudo apt-cache policy rackhd |
- Install specified RackHD , the ${version} is the one of the version list obtained by above step
| Code Block |
|---|
| language | bash |
|---|
| theme | Emacs |
|---|
| title | Install RackHD |
|---|
|
sudo apt-get install aptitude
sudo aptitude install rackhd=${version} |
2. OVA
| Info |
|---|
temporarily, the OVA download URL are only available inside DellEMC internal network , until we find a cloud disk space to store the released OVA images. if you want a OVA image of RackHD , please turn to rackhd@emc.com you are also welcomed to build OVA by yourselves . |
| Info |
|---|
ova user/password: vagrant/vagrant |
1.0.0 release
http://rackhdci.lss.emc.com/job/BuildRelease/job/Build/job/ova-build/
Latest nightly build :
Download the artifacts of last successful build
http://rackhdci.lss.emc.com/job/BuildRelease/job/Build/job/ova-build/
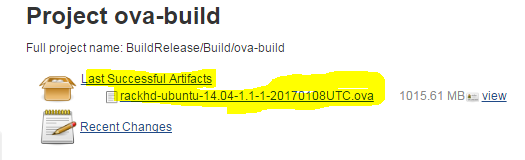 Image Removed
...
So far, vSphere(ESX server) is NOT supported with customized properity (OVF 2.0 ?). only vCenter can support this OVA (because there's a customized prosperity feature to config IP during deployment.) reference: https://blogs.vmware.com/vapp/2009/07/commandline-ovf-deployments-.html
if you want to deploy to vSphere/ESXi, follow below steps:
| Code Block |
|---|
|
$# 1. Demote  the OVA file name is rackhd-ubuntu-14.04 , example
FNAME=rackhd-ubuntu-14.04
|
| Code Block |
|---|
|
$# 2. covert OVA to OVF and VMDK
ovftool   ${FNAME}.ova        ${FNAME}.ovf
#  or using 7zip :  -->     7z x ${FNAME}.ova
# then there will be 3 files: ${FNAME}-disk1.vmdk             ${FNAME}.mf                   ${FNAME}.ovf
|
| Code Block |
|---|
|
$# 3. replace the Property XML fields from the .ovf file
sed  -i  "/<Property/,/<\/Property>/c\ "  ${FNAME}.ovf
|
| Code Block |
|---|
|
$# 4. then deploy with the updated ${FNAME}.ovf file via ESXi vSphere GUI or ovftool command line
      #below is an example of ovftool usage:
 ovftool  --skipManifestCheck  --name=${GivenNameOfTheVM} --datastore=${TargetDatastore}      ${FNAME}.ovf           vi://user:pwd@${ESXi_IP}
|
3.Install from source code
1.0.0 release
Prerequisite :
- Install NodeJS 4.0 or upper
How to :
To clone and checkout to 1.0.0 release code. you can use this script in attachment or follow below steps.
| Code Block |
|---|
| language | bash |
|---|
| theme | Midnight |
|---|
|
sudo ./get_rackhd_release_from_src.sh 1.0.0 |
above command line will clone and build local code , according to git tag "release/1.0.0". then using PM2 to start services.
you can change the tag name from 1.0.0 to other tag.
| View file |
|---|
| name | get_rackhd_release_from_src.sh |
|---|
| height | 250 |
|---|
|
if you would like to do it by yourselves , you can follow:
1. clone all RackHD repos, then go into each on them:
| Code Block |
|---|
| language | bash |
|---|
| theme | Midnight |
|---|
|
git fetch --all --tags
git checkout 1.0.0        # or 1.0.0-rc , depends on which tag you want to checkout
npm install --production |
2. link the on-core/on-tasks repo, to other repo's node_modules
| Code Block |
|---|
| language | bash |
|---|
| theme | Midnight |
|---|
|
cd $repo/node_modules
rm on-core -rf
rm on-tasks -rf
ln -s ../../on-core      on-core
ln -s ../../on-tasks on-tasks |
3. using PM2 to start services
create a pm2.yml like below, the ```cwd``` should locate the where the on-xxx code lives.
then run #sudo pm2 start pm2.yml
| Code Block |
|---|
| language | text |
|---|
| theme | Midnight |
|---|
|
apps:
  - script: index.js
     name: on-taskgraph
     cwd: on-taskgraph
  - script: index.js
     name: on-http
     cwd: on-http
  - script: index.js
     name: on-dhcp
     cwd: on-dhcp-proxy
  - script: index.js
     name: on-syslog
     cwd: on-syslog
  - script: index.js
     name: on-tftp
cwd: on-tftp |
4. Vagrant box
Before using vagrant we suggest to read vagrant docs first.
1.0.0 release
- Get RackHD vagrant box
") Note : vagrant version should be at least >= 1.8.5, to support `--box-version` parameter. ( check by ```vagrant -v ```)
Note : vagrant version should be at least >= 1.8.5, to support `--box-version` parameter. ( check by ```vagrant -v ```)
This code snippet will pull the rackhd vagrant box of version 1.0.0. You can read the generated Vagrantfile for more configuration information.
| Code Block |
|---|
| language | bash |
|---|
| theme | Emacs |
|---|
| title | Get rackhd vagrant box |
|---|
|
vagrant init rackhd/rackhd --force --box-version 1.0.0  # rackhd/rackhd is the Atlas repository of rackhd, this cmd will generate a simple Vagrantfile
vagrant up                                              # start the rackhd vagrant box according to Vagrantfile
vagrant ssh # enter the box |
- Important Tips
For running RackHD service successfully, you need to up a second netcard.
For change configuration of RackHD, you need to mount local config into vagrant.
For connecting RackHD out of box, you need to forward internal ports to outside .
") Please see our example Vagrantfile for details. ( it's recommended to customized the vagrant file based on this example )
Please see our example Vagrantfile for details. ( it's recommended to customized the vagrant file based on this example )
Latest nightly build
Format of nightly build version is 0.mm.dd. For example, you can get the nightly build on January 13 with
| Code Block |
|---|
| language | bash |
|---|
| theme | Emacs |
|---|
| title | Get latest nightly build |
|---|
|
vagrant init rackhd/rackhd --force --box-version 0.01.13 |
...
ATTENTION: nightly builds will only be kept for two weeks.
5.Docker
1.0.0 release
| Code Block |
|---|
| language | bash |
|---|
| theme | DJango |
|---|
| title | Get docker images |
|---|
|
git clone https://github.com/RackHD/RackHD.git
cd RackHD/docker
sudo TAG=1.0.0 docker-compose pull               # Download pre-built docker images.
sudo TAG=1.0.0 docker-compose up # Create containers and Run RackHD. |
...
| Code Block |
|---|
| language | bash |
|---|
| theme | DJango |
|---|
| title | Get latest nightly build |
|---|
|
git clone https://github.com/RackHD/RackHD.git
cd RackHD/docker
sudo TAG=nightly docker-compose pull               # Download pre-built docker images.
sudo TAG=nightly docker-compose up # Create containers and Run RackHD. |
6.NPM
...
|
The 1.0.0 installation guide page has been migrated to RackHD Release Installation Guide |